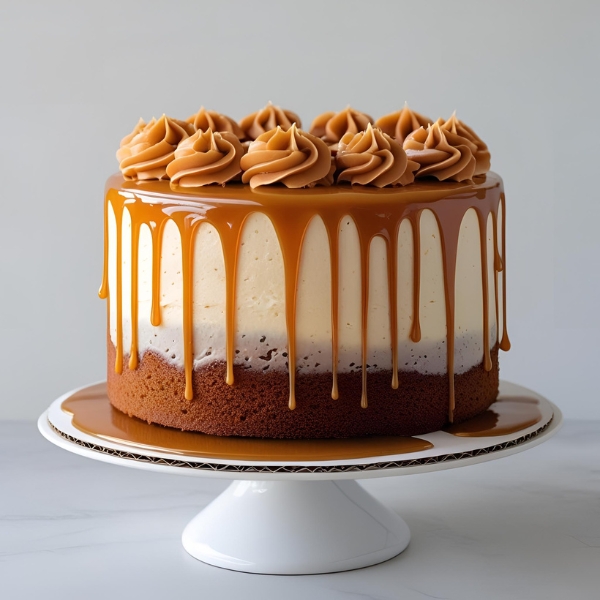
Caramel Drip Cake – Smooth, Rich, and Simply Irresistible

Caramel drip cakes are like comfort in a slice. They combine a soft sponge, creamy frosting, and that slow, golden caramel that gently slides down the sides.
It looks fancy, but once you get the hang of the steps, it’s really just about good timing and patience.
You need to start by making a thick caramel sauce—one that cools just enough to drip smoothly but stays in place.
I suggest making it from scratch using sugar, butter, and cream. It gives a much better flavor than store-bought.
Pair it with a vanilla or brown sugar sponge, and don’t forget to chill the frosted cake before you drip.
That contrast of cold frosting and warm caramel is what creates that beautiful, slow-motion effect.
Recipe Overview
| Prep Time | Cook Time | Total Time | Course | Cuisine | Servings |
|---|---|---|---|---|---|
| 35 minutes | 30 minutes | 65 minutes + chilling | Dessert | Modern | 10–12 slices |
Ingredients List
| Ingredient | 6 Servings | 12 Servings | Alternatives |
|---|---|---|---|
| All-purpose flour | 1½ cups | 3 cups | Cake flour |
| Brown sugar | 1 cup | 2 cups | Coconut sugar |
| Eggs | 2 | 4 | Mashed banana (¼ cup per egg) |
| Butter (softened) | ½ cup | 1 cup | Vegetable oil |
| Milk | ¾ cup | 1½ cups | Buttermilk |
| Vanilla extract | 1 tsp | 2 tsp | Maple extract |
| Powdered sugar (for frosting) | 2 cups | 4 cups | Blended maple sugar |
| Salted butter (for caramel) | ¼ cup | ½ cup | Unsalted butter + pinch of salt |
| Heavy cream (for caramel) | ⅓ cup | ⅔ cup | Evaporated milk |
| White sugar (for caramel) | ½ cup | 1 cup | Golden syrup |
Tools You’ll Need (with Alternatives)
- Mixing bowls (or large containers)
- Hand or stand mixer (or whisk, if patient)
- Measuring cups/spoons (or digital scale)
- 8-inch cake pans (or 9-inch with more height)
- Cooling rack (or parchment-lined tray)
- Offset spatula (or the back of a spoon)
- Medium saucepan (or thick-bottomed pot)
- Heatproof spoon (or silicone spatula)
- Piping bag (or squeeze bottle/zip bag for drip)
- Cake turntable (or lazy susan/plate)
How to Make the Caramel Drip Cake
Before diving into the layers and dripping, get your caramel ready early so it can cool to the right temperature.
Here’s how I recommend breaking it down:
Step 1: Make the Sponge
Mix flour and sugar in a bowl. In another, whisk the eggs with melted butter, milk, and vanilla.
Combine the two gently until the batter is smooth and pourable.
Step 2: Bake the Cake
Preheat oven to 350°F (175°C). Grease and line your cake pans. Divide the batter and bake for 25–30 minutes.
Let cool completely on racks.
Step 3: Prepare the Caramel
In a medium saucepan, heat sugar over medium heat. Stir gently until it melts and turns amber.
Add butter carefully (it will bubble), then pour in cream. Stir until smooth. Let it cool for 30–40 minutes until thick but pourable.
Step 4: Make the Frosting
Whip butter until fluffy. Add powdered sugar gradually and beat until smooth. You can add a tablespoon of caramel here for flavor.
Step 5: Assemble and Chill
Stack the cakes with frosting in between layers. Apply a crumb coat, chill for 30 minutes, then finish with a smooth outer layer of frosting.
Chill again before adding the drip.
Step 6: Drip the Caramel
Spoon the cooled caramel around the top edge, letting it gently drip down. Use a piping bag or spoon for precision.
Chill for 10 minutes to set.
Step 7: Finish with Garnish
Top the cake with a drizzle of caramel in the center, a sprinkle of sea salt, or a few decorative swirls of frosting.
Decoration & Serving Tips
- Drizzle extra caramel over slices before serving
- Add a touch of flaked salt to balance sweetness
- Use toffee shards, crushed pretzels, or roasted nuts for garnish
- Chill cake before slicing to keep drip neat
Variations to Try
- Salted Caramel Chocolate Cake: Use chocolate sponge and dark chocolate buttercream
- Apple Spice Sponge: Add cinnamon and grated apple to the batter
- Caramel Coffee Frosting: Add a teaspoon of instant espresso to the buttercream
- Brown Butter Caramel: Brown the butter before adding it to the caramel for a nutty depth
- Layered Toffee Bits: Mix toffee pieces into the frosting for texture
Storing Tips
- Keep in the fridge for up to 4 days
- Let it sit out 20 minutes before slicing
- Caramel may firm up—warm slices slightly if needed
- Freeze layers (unfrosted) for up to 2 months
Extra Tips for Best Results
- Stir caramel constantly to avoid burning
- Don’t apply drip while it’s too hot—it will melt frosting
- If caramel thickens too much, warm gently before using
- Use a turntable for smoother frosting coverage
Common Mistakes & How to Fix Them
| Mistake | Solution | Prevention |
|---|---|---|
| Caramel crystalizes | Add a splash of water and reheat gently | Don’t stir too early, use clean utensils |
| Drip runs too fast | Chill cake and cool caramel more | Always drip on chilled frosting |
| Sponge sinks in the center | Trim and level with a knife | Don’t open oven door early |
Bake This Caramel Beauty and Let Me Know What You Think
This caramel drip cake is soft, sweet, and just the right amount of fancy without the stress.
Try it your way and share how it turned out—or what you paired it with!