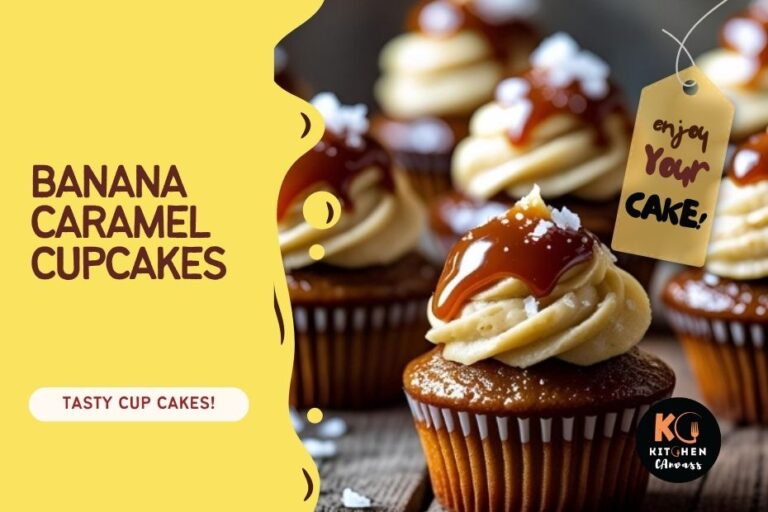
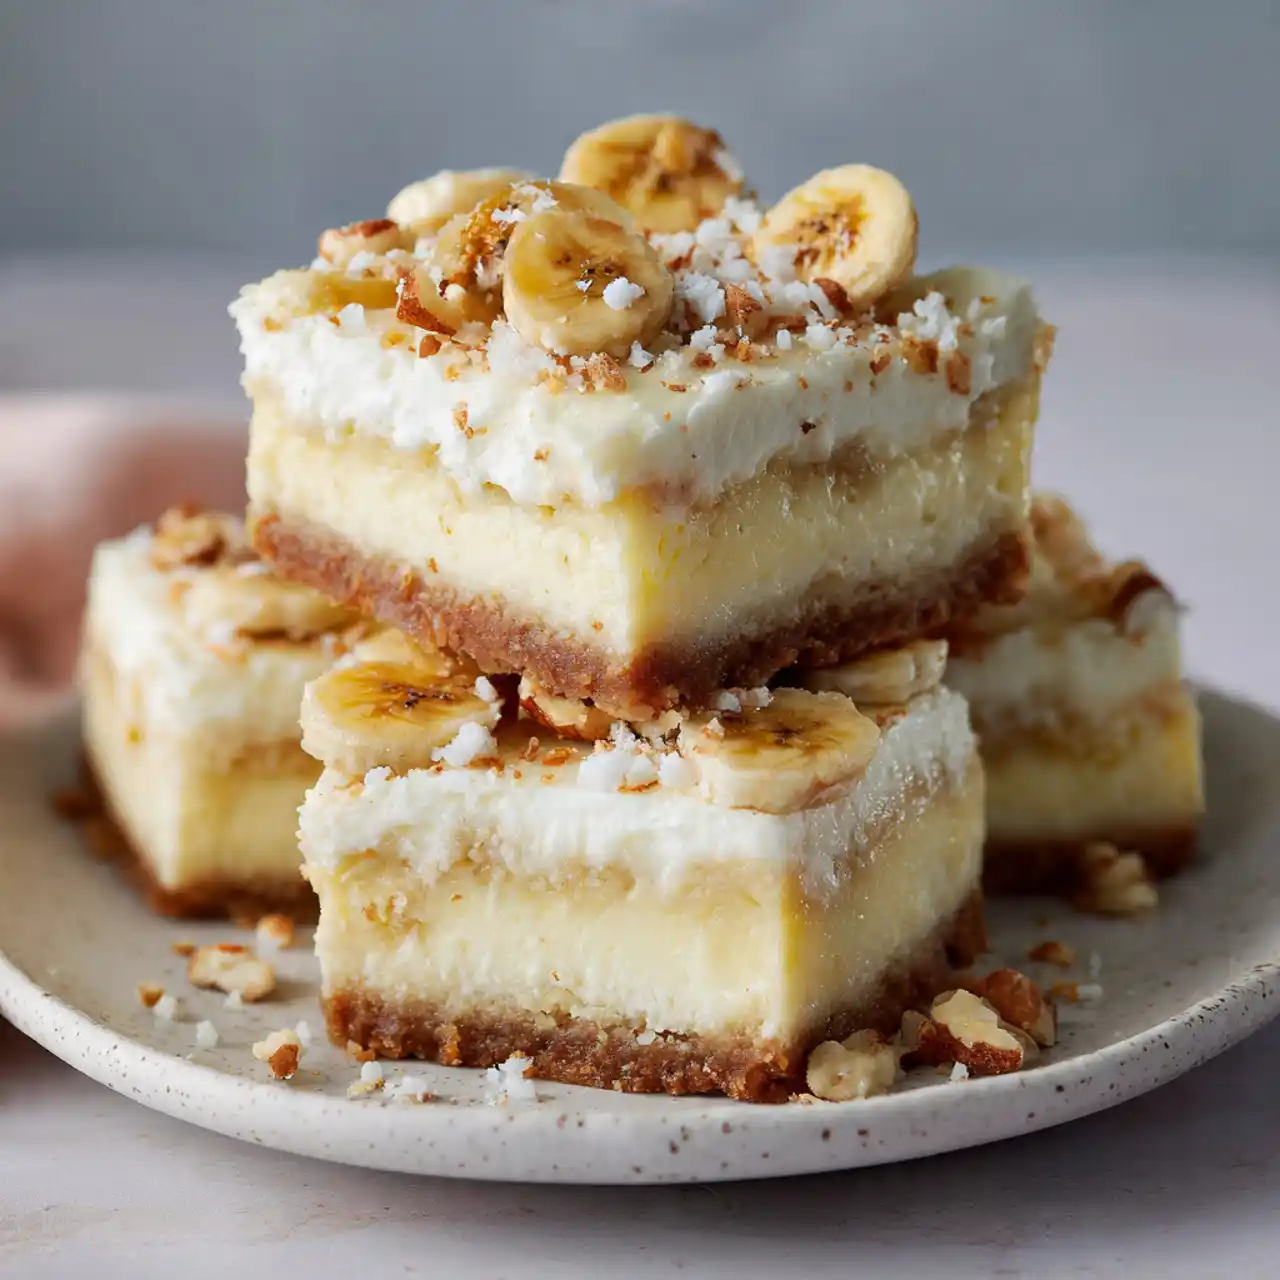
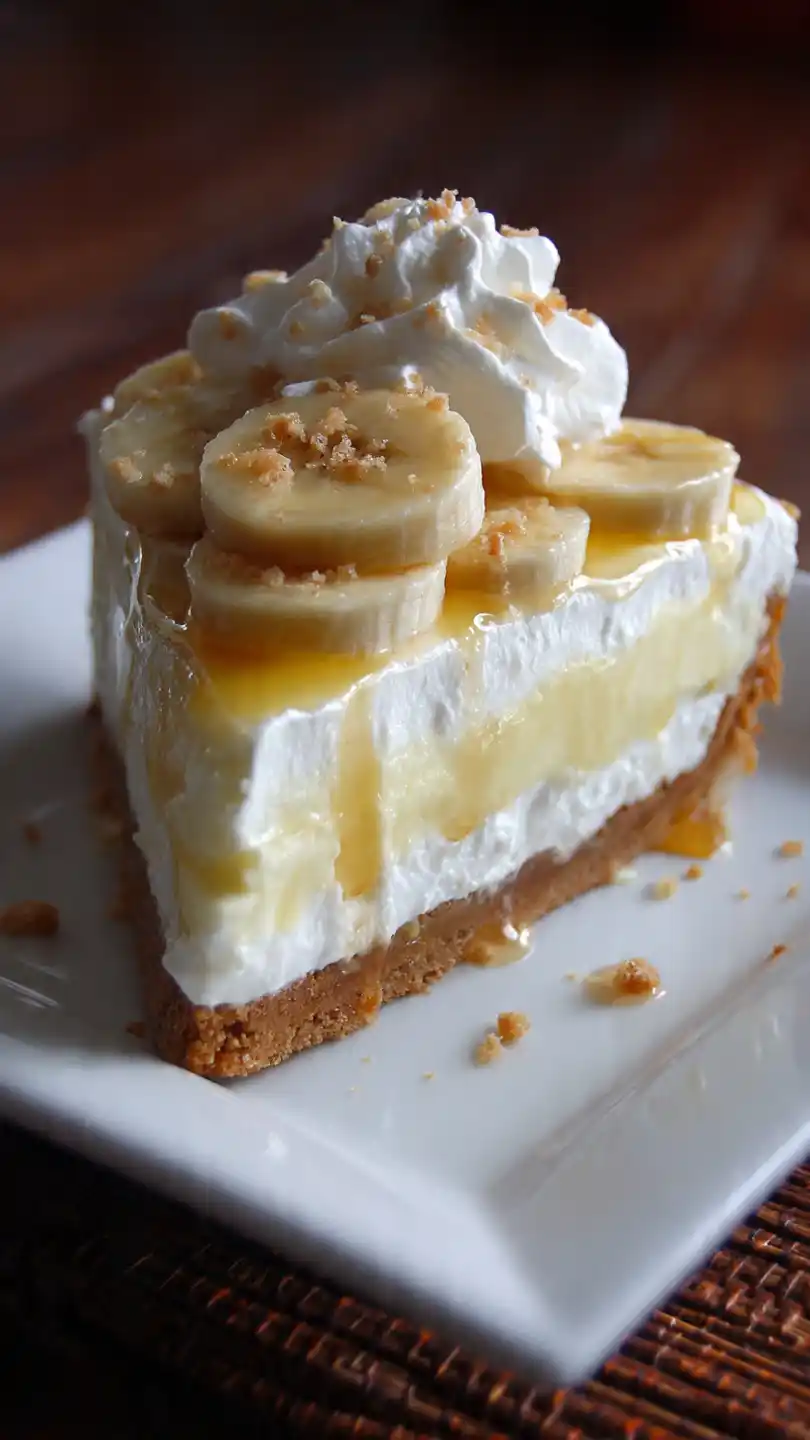
Banana Pudding Cheesecake Bars That Fix Bland, Boring Desserts
Hold on — banana pudding and cheesecake? In bar form? Yes, please.
I know what you’re thinking. “Another banana dessert?” Yes. But hear me out. Banana pudding is amazing. Cheesecake is amazing. But sometimes you want something you can pick up with your hands and eat while walking past the fridge at 10 PM. That’s where Banana Pudding Cheesecake Bars come in. They’re creamy, they’re sliceable, they’ve got that cookie crust situation going on, and they taste like summer cookouts and childhood memories — but make it fancy. Plus, no water bath. No cracks on top. No stress. Just bars.
Why This Recipe is Awesome
First, it’s no-bake which means you can make these when it’s 95 degrees outside and your oven is basically a hate crime. Second, you get the best of both worlds: the silky texture of cheesecake plus the nostalgic flavor of banana pudding. Third, they’re portable. You can cut them into squares, stack them in a container, and bring them to a party where everyone will ask for the recipe.
Also, the crust is made of vanilla wafers. That’s not a typo. You’re literally turning cookies into a buttery, press-in-the-pan crust. It takes 5 minutes and zero skill. Even I didn’t mess it up, and I once burned water. TBH these bars are almost too easy. Almost.
Ingredients You’ll Need
For the vanilla wafer crust:
- 2 cups vanilla wafer crumbs (about 45–50 cookies)
- 6 tbsp unsalted butter, melted
- 2 tbsp granulated sugar
- Pinch of salt
For the banana cheesecake filling:
- 2 blocks (16 oz total) cream cheese — softened. Don’t rush this.
- ½ cup granulated sugar
- ¼ cup brown sugar
- 1 tsp vanilla extract
- 1 cup mashed ripe bananas (about 2–3 medium bananas)
- 1 cup heavy whipping cream (cold)
For the pudding layer & topping:
- 1 box (3.4 oz) instant banana pudding mix (or vanilla if you can’t find banana)
- 1 ½ cups cold milk
- ½ cup sour cream (trust me on this)
- Extra vanilla wafers and banana slices for garnish
Step-by-Step Instructions
- Make the crust. Crush the vanilla wafers into fine crumbs. A food processor works best, but a ziploc bag and a rolling pin works too (and it’s great for releasing stress). Mix the crumbs with melted butter, sugar, and salt until it looks like wet sand. Press firmly into a 9×9-inch square pan lined with parchment paper. Use the bottom of a measuring cup to really pack it down. Chill in the fridge while you make the filling.
- Whip the cream. In a cold bowl, beat the heavy cream until stiff peaks form. Set aside. This will lighten up your cheesecake filling so it’s not dense like a brick.
- Make the cheesecake layer. In a large bowl, beat the cream cheese, granulated sugar, brown sugar, and vanilla until smooth and fluffy. Add the mashed bananas and beat again. It might look a little loose — that’s fine. Gently fold in the whipped cream until combined. Don’t overmix or you’ll deflate all that fluffy goodness.
- Spread the cheesecake mixture over the chilled crust. Smooth the top with a spatula. Pop it back in the fridge while you make the pudding layer.
- Make the pudding layer. In a medium bowl, whisk the instant banana pudding mix with cold milk for about 2 minutes. Let it sit for 5 minutes to thicken. Then whisk in the sour cream until smooth. This adds a tangy little kick that balances the sweetness.
- Layer the pudding on top of the cheesecake layer. Spread it evenly. Then gently press a few extra vanilla wafers into the top for decoration — or just crumble some over. Both work.
- Refrigerate for at least 6 hours, preferably overnight. This is the hardest part. The bars need time to set up so they slice cleanly. If you try to cut them early, you’ll get a mushy mess. Be patient. Read a book. Scroll your phone. Stare at the fridge longingly.
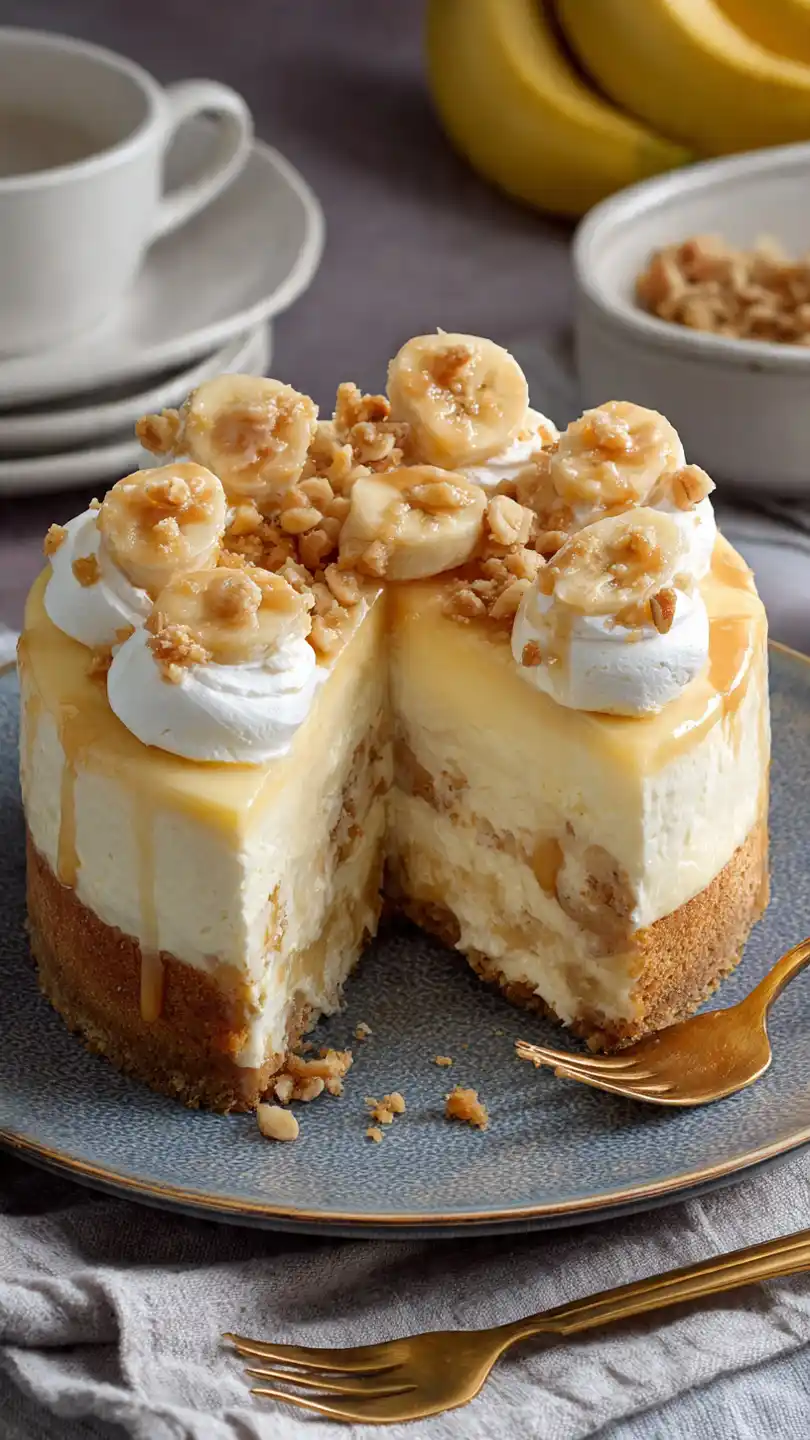
- When ready to serve, slice into 9 or 12 bars. Garnish with fresh banana slices and a drizzle of caramel if you’re feeling extra. Then try not to eat all of them in one sitting.
Common Mistakes to Avoid
- Not softening the cream cheese enough. Cold cream cheese = lumpy bars. Leave it out for an hour. Or microwave in 10-second bursts. But watch it — nobody wants melted cream cheese soup.
- Using warm cream for whipping. Heavy cream whips best when it’s cold. Stick the bowl and beaters in the freezer for 10 minutes beforehand. You’re welcome.
- Skipping the sour cream in the pudding layer. It adds a subtle tang that balances the sweetness. Without it, the pudding layer tastes a little flat. Just try it.
- Cutting the bars too early. I know you’re excited. But warm cheesecake bars are sad, floppy disasters. Let them chill. Future you will be so proud.
Alternatives & Substitutions
- Can’t find banana pudding mix? Use vanilla pudding mix and add ½ teaspoon banana extract. Or just lean into vanilla — it still tastes great.
- No heavy cream? Use 1 ½ cups Cool Whip folded into the cheesecake mixture instead. Different texture but still delicious.
- Gluten-free? Use gluten-free vanilla wafers (they exist!) and check your pudding mix. Most instant puddings are gluten-free but double-check the box.
- Add chocolate chips. Fold ½ cup mini chocolate chips into the cheesecake layer. Banana + chocolate = a classic combo that never fails.
- Make it a trifle instead. Skip the crust and layer everything in a big glass bowl. Same flavors, totally different vibe.
FAQ
Can I use regular bananas instead of ripe ones?
You want ripe bananas — the ones with brown spots. They’re sweeter and mash better. Green bananas are too starchy and won’t give you that classic banana pudding flavor. Let them sit on the counter for a few days. Or throw them in a paper bag to speed things up.
Why did my cheesecake layer crack?
It didn’t — because this is no-bake! That’s the beauty. No water bath, no cooling in the oven, no stress. Cracking is for baked cheesecakes. You’re officially off the hook.
How long do these bars last in the fridge?
About 4 days in an airtight container. After that, the bananas in the cheesecake layer might start to brown and the texture gets softer. Still edible, just not as pretty. Pro tip: add fresh banana slices only right before serving.
Can I freeze these bars?
Yes! Freeze the whole uncut pan (without fresh banana garnish) for up to 2 months. Wrap it tightly in plastic wrap then foil. Thaw overnight in the fridge before slicing. The texture holds up surprisingly well. The pudding layer might weep a tiny bit, just blot it with a paper towel and pretend nothing happened.
Final Thoughts
You just made bars that taste like someone spent hours in the kitchen — but really you spent 20 minutes layering and the fridge did the rest. That’s not cheating. That’s smart baking. Or smart “not-baking.” Whatever you call it, these banana pudding cheesecake bars are going to disappear fast. Bring them to a cookout. Leave them in the break room. Eat three for breakfast while standing over the sink. I support all of it. Now go chill — literally. The bars are waiting.